

Clients
For admins
A client represents a customer you send timesheets to. The Clients page is where you create them and tag the repositories whose work belongs to them. It is for org admins.
A client groups work; it does not hold billing rates, currency or amounts. ChronoTab has no money fields.
Create a client
Section titled “Create a client”-
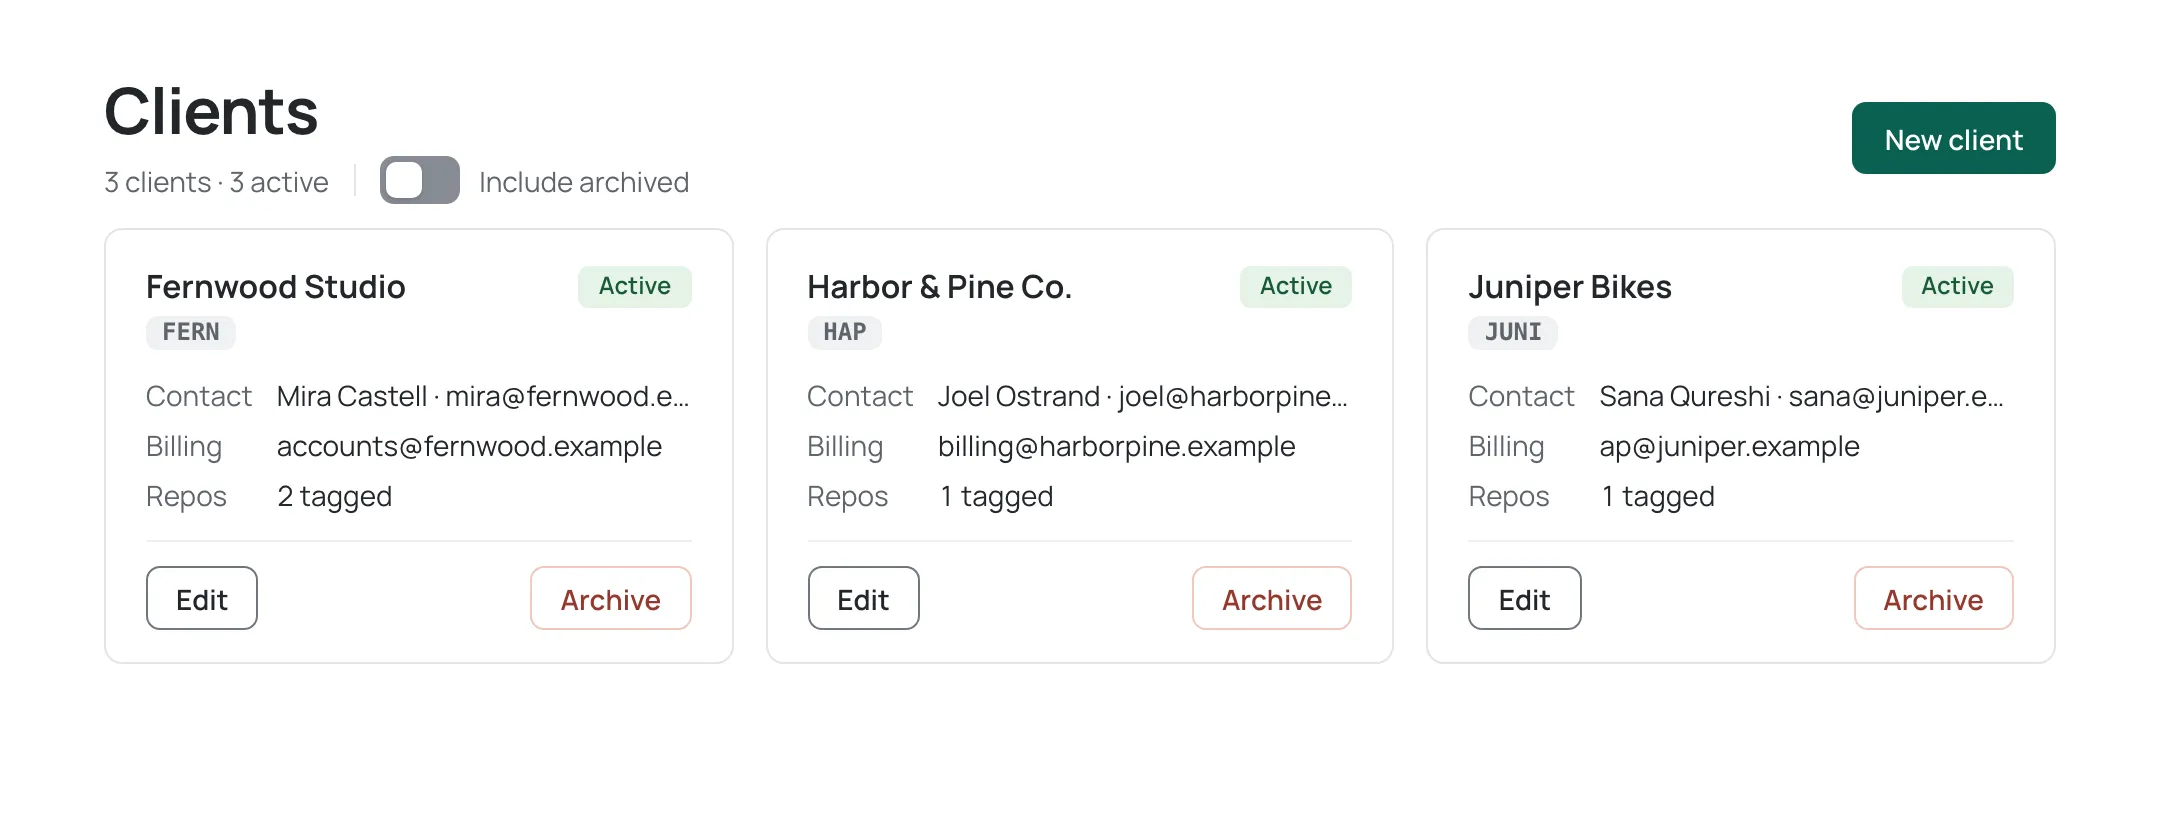
Open Clients in the Administer group of the sidebar. Each client is shown as a card with its name, code, status, contact, billing email and how many repositories are tagged to it; a line under the page title counts them, for example 4 clients · 3 active.
-
Choose New client. A panel opens at the side of the page.
-
Fill in Name.
-
Fill in Code — a short slug, for example ACME. The code cannot be changed after the client is created, it must be unique within your organisation, and it is used in timesheet reference labels. As you type, ChronoTab checks whether the code is already taken and shows Available or the message “That client code is already in use — choose another.”
-
Optionally fill in Primary contact name, Primary contact email, Billing email and Notes.
-
Optionally tag repositories to the client straight away (see below).
-
Choose Create client.
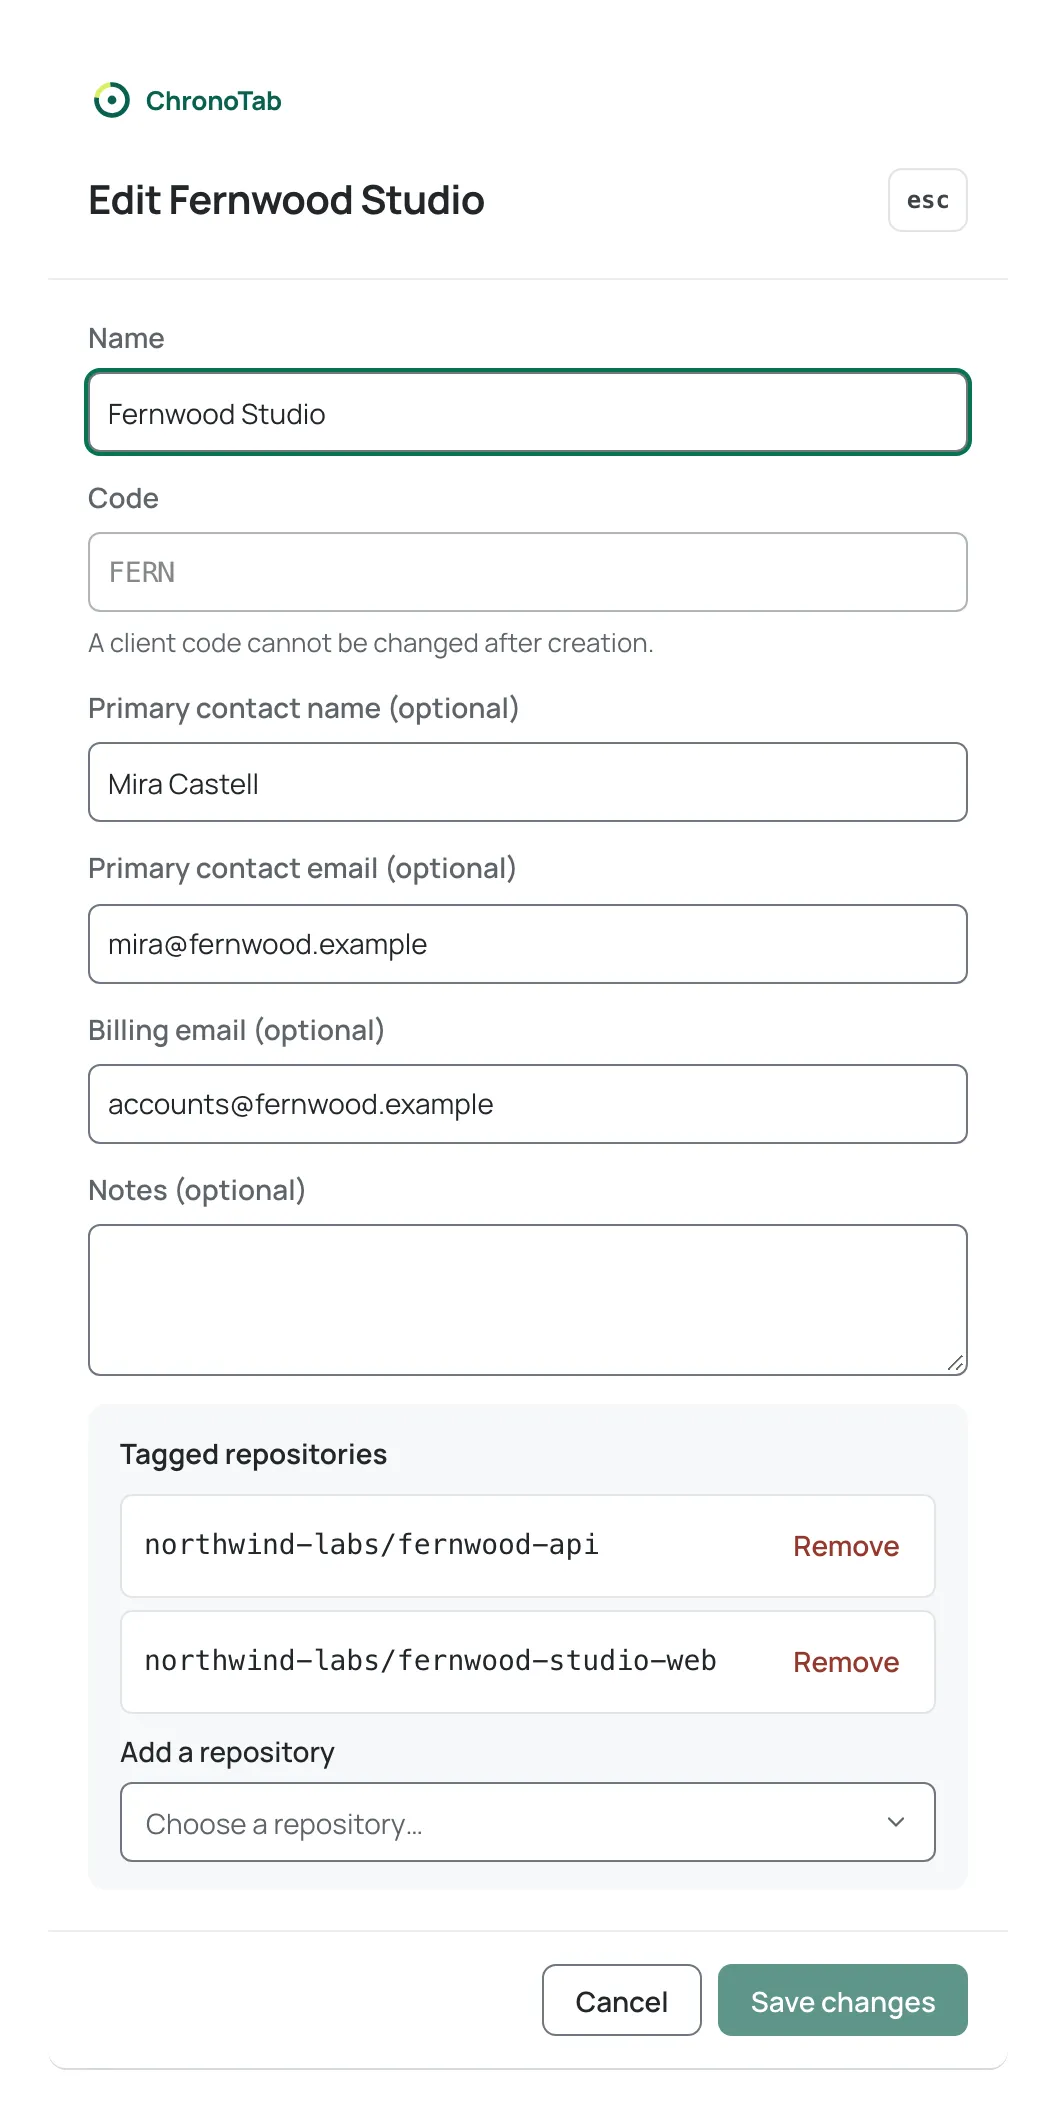
To change a client’s name or contact details later, choose Edit on its card and then Save changes. The Code is shown but cannot be edited. Cancel, the close button or Esc closes the panel without saving.
Tag repositories to a client
Section titled “Tag repositories to a client”Tagging is what tells ChronoTab which work belongs to a client. A repository can be tagged to only one client, and tagging is managed in the client’s own panel.
- On Clients, choose Edit on the client (or start a New client).
- Under Tagged repositories, open the Add a repository picker and choose a repository. It joins the list straight away, with an Undo button while the change is unsaved.
- To remove a tag, choose Remove beside the repository. It is struck through, and Undo puts it back until you save.
- Choose Save changes (or Create client) to apply all of the tag changes together. A line under the list sums up what will change, for example Adding 2, removing 1. Cancel discards them.
Things that can happen while tagging:
- The picker only offers repositories not already tagged to a client. If every tracked repository is tagged, it says “Every allowlisted repository is already tagged to a client.”
- A repository must already be tracked before it can be tagged. Add it first on the Repositories page.
Tag many repositories at once
Section titled “Tag many repositories at once”You can also set a repository’s client from Manage repositories (in Settings, under GitHub). Choose a client when you add a repository, use Edit on a row, or select several rows and choose Assign to client… or Remove from client. The clients offered are the ones on this page; archived clients are not offered, and the repositories of an archived client cannot be changed there. See Repositories.
- The picker reflects tags as they stood when you opened the panel. If another admin tags the repository to a different client before you save, saving fails with “That repo is already tagged to another client — remove that tag first.” Close and reopen the panel to refresh the picker.
- A repository just added on the Repositories page briefly cannot be tagged while ChronoTab is still syncing it from GitHub: “That repo hasn’t finished syncing from GitHub yet — try again shortly.” Wait a few minutes and try again.
Archive a client
Section titled “Archive a client”- On Clients, choose Archive on the client’s card.
- A confirmation opens beside the button, naming the client and its code. Check it, then choose Archive client.
Archiving is a status change, not a delete:
- The client is hidden from the client timesheet generation flow and from the active list.
- Its existing timesheets stay resolvable.
- Its repository tags are kept.
- Its details become read-only: its card offers View instead of Edit.
Turn on Include archived to see archived clients in the list. An archived client is not offered in the generation flow or the active list.
To bring a client back, turn on Include archived and choose Unarchive on its card. This needs no confirmation, and the client returns to the active list and the generation flow.
How clients affect timesheets and reports
Section titled “How clients affect timesheets and reports”Tagging a repository to a client is what makes the client’s work group together:
- Timesheets are generated for a client and cover every repository tagged to it. See Generate a timesheet.
- A repository with no client tagged to it has no timesheet capability: it is not offered in the generation flow, and its time can only be reviewed in Reports.
- The Reports client filter uses the same tags to show only that client’s work. See Reports.
Next steps
Section titled “Next steps”- Check that the repositories you want to tag are tracked on the Repositories page.
- Send work to a client with Generate a timesheet.
- Review tagging changes in the Audit log.
Need help? Email support@chronotab.com.